Reactive repair 또는 Scheduled maintenance 대신 머신러닝을 사용하여 Predictive maintenance가 가능.

원문: https://insights.hpe.com/articles/how-ai-will-work-at-the-industrial-iot-edge-1706.html
 0 comments
 Reactive repair 또는 Scheduled maintenance 대신 머신러닝을 사용하여 Predictive maintenance가 가능.
원문: https://insights.hpe.com/articles/how-ai-will-work-at-the-industrial-iot-edge-1706.html
0 comments 회사에서 개발하고 있는 Waggle, IoT device for 3D Printer의 킥스타터 크라우드 펀딩 종료.

0 comments 
HC-05
HC-06
0 comments 

setWatch(function() { console.log(“Pressed”);}, BTN, {edge:”rising”, debounce:50, repeat:true});
via nRF Toolbox App (Android & iOS)
0 comments IoT 디바이스에 접급을 위해서 앱이 필요한 경우가 있는데, 이럴 경우 디바이스마다 앱이 존재하게 된다. 구글에서는 이걸 웹에서 해결하겠다는 접근이 피지컬 웹(Physical Web)이다. 이렇게 할 때의 장점은 디바이스에는 적은 기능만 넣고, 나머지는 웹쪽에서 구현을 하겠다는 의미이다. 이때 IoT 디바이스(비콘)가 자신의 URL을 주기적으로 Broadcasting하기만 하면 된다.
관련 정보
https://github.com/google/physical-web
2 comments 1. gcc 설치
여기에서 다운로드 한다.
$ mkdir /usr/local/gcc-arm
$ tar -xjf gcc-arm-none-eabi-5_4-2016q3-20160926-mac.tar.bz2 -C /usr/local/gcc-arm
2. nRF5x-Command-Line-Tools-OSX
여기에서 다운로드 한다.
/usr/local/ 에 nrfjprog와 mergehex를 copy한다.
3. .bash_profile 수정
export PATH=/usr/local/bin:/usr/local/sbin:/usr/local/nrfjprog:$PATH
4. Segger Software and documentation pack for Mac OS X 설치
여기에 패키지 파일이 있다.
5. SDK설치 및 Makefile.posix 파일 수정
여기 또는 여기에서 SDK를 다운로드 해서 원하는 곳에서 압축을 푼다.
components/toolchain/gcc/Makefile.posix 이 파일을 gcc 버전에 맞게 수정한다.
GNU_INSTALL_ROOT := /usr/local/gcc-arm/gcc-arm-none-eabi-5_4-2016q3
GNU_VERSION := 5.4.1
GNU_PREFIX := arm-none-eabi
6. 컴파일 및 확인
example 폴더 아래에서 make해서 hex 파일이 생성되는지 확인한다.
$ make
7. 보드와 연결해서 다운로드가 되는지 확인한다.
$ make flash
Nordic에서 출시한 보드
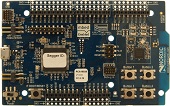
PCA10028
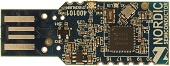
PCA10031
참고
https://devzone.nordicsemi.com/blogs/22/getting-started-with-nrf51-development-on-mac-os-x/
https://aaroneiche.com/2016/06/01/programming-an-nrf52-on-a-mac/
http://www.nordicsemi.com/eng/Products/Bluetooth-low-energy/nRF51822
Getting started with the nRF5 development kit
https://devzone.nordicsemi.com/tutorials/
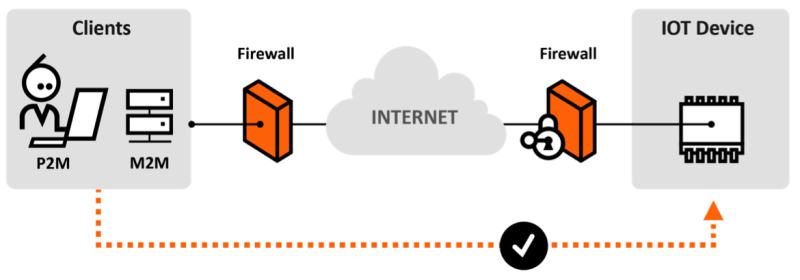
1 comment Nabto provides a full communication infrastructure to allow real-time direct, encrypted communication between end-user clients (tablets, smartphones, PC) and resource limited devices (< 1kb RAM and up) – the Nabto communication platform. The platform provides direct real-time connectivity with no firewall or dynamic IP hassle – just as you know from e.g. Skype™.
Nabto 사용법
Nabto 디바이스 포털 https://developer.nabto.com/) 에서 ID를 등록하고 Add Device에 디바이스 이름을 입력후 디바이스를 추가한다. 이 디바이스 ID는 xxxx.demo.nab.to 이런 형태가 된다.
그러면 디바이스의 status가 나오고 Key가 할당이 된다. 이 Key는 보안 연결에 사용이 되며 HTML-DD는 HTML Device Driver로 web GUI를 포함하는데 default를 사용한다.
uNabto SDK(unabto_sdk.zip)를 다운로드 후 압축을 풀고 다음과 같이 빌드를 한다.
cd unabto_sdk/unabto/apps/pc_demo/
cmake .
make
이렇게 하면 pc_demo 라는 실행파일이 생성이 되는데 다음과 같이 디바이스 이름과 Key를 입력하여 실행을 한다.
./pc_demo -d [xxxx.demo.nab.to] -s -k [KEY]
아래는 jbtest2.demo.nab.to로 실행을 한 결과인데 마지막에 연결 상태가 WAIT_GSP to ATTACHED가 되어야 한다.
16:47:23:876 unabto_main.c(41) Identity: ‘jbtest2.demo.nab.to’
16:47:23:876 unabto_main.c(42) Program Release 2.21889
16:47:23:876 unabto_main.c(43) Buffer size: 1500
16:47:23:876 unabto_common_main.c(127) Device id: ‘jbtest2.demo.nab.to’
16:47:23:876 unabto_common_main.c(128) Program Release 2.21889
16:47:23:879 unabto_app_adapter.c(698) Application event framework using SYNC model
16:47:23:885 unabto_context.c(55) SECURE ATTACH: 1, DATA: 1
16:47:23:885 unabto_context.c(63) NONCE_SIZE: 32, CLEAR_TEXT: 0
16:47:23:885 unabto_common_main.c(206) Nabto was successfully initialized
16:47:23:885 unabto_context.c(55) SECURE ATTACH: 1, DATA: 1
16:47:23:885 unabto_context.c(63) NONCE_SIZE: 32, CLEAR_TEXT: 0
16:47:23:886 unabto_attach.c(787) State change from IDLE to WAIT_DNS
16:47:23:886 unabto_attach.c(788) Resolving dns: jbtest2.demo.nab.to
16:47:24:411 unabto_attach.c(809) State change from WAIT_DNS to WAIT_BS
16:47:24:424 unabto_attach.c(292) Sending INVITE to Base Station: 1
16:47:24:725 unabto_attach.c(474) State change from WAIT_BS to WAIT_GSP
16:47:24:736 unabto_attach.c(303) Sending INVITE to GSP: 1
16:47:24:736 unabto_attach.c(266) ######## U_INVITE with LARGE nonce sent, version: – URL: –
16:47:25:084 unabto_attach.c(624) nmc.ctx.privat : 0.0.0.0:53538
16:47:25:085 unabto_attach.c(625) nmc.ctx.global : 210.113.20.1:53538
16:47:25:086 unabto_attach.c(573) GSP-ID(nsi): 3148170758
16:47:25:086 unabto_attach.c(575) State change from WAIT_GSP to ATTACHED
디바이스 포털에서 디바이스의 상태가 Offline에서 Online으로 바뀐 것을 볼 수 있다.
Nabto app이나 브라우져(브라우저는 IE나 Firefox만 지원하며 플러그인을 설치해야 한다.)에서 nabto://디바이스이름.demo.nab.to를 실행한다.

데모웹에서 스위치를 on/off하면 실행시킨 터미널에서 메시지를 볼 수 있다.
Arduino에서 테스트하는 방법
아두이노와 네트워크 연결을 위한 Ethenet 쉴드가 필요하다.
0 comments 
“Help”->Check for Updates를 누르고, Processor Expert for Kinetis만 선택하고 업데이트 한다.
“Help” -> “Install New Software”를 선택하고 Add 버튼 > Archive 버튼을 눌러서 SDK 설치 폴더 아래 /tools/eclipse_update 폴더에서 KSDK_<version>_Eclipse_Update_zip file. 를 선택한다

“File->Import”를 선택후 “General”을 눌러서 “Existing Projects into Workspace”를 선택한다.
루트 디렉토리는 <install_dir>/lib/ksdk_platform_lib/kds/K82F25615 를 선택하고 finish를 클릭한다.
메뉴에 헤머 아이콘을 눌러 빌드한다.
<install_dir>/examples/frdmk82f/demo_apps/<demo_name>/kds 아래있는 데모 프로그램을 플랫폼 라이브러리 빌드 할때와 마찬가지로 빌드한다.
예를 들면 hello_world의 경우 <install_dir>/examples/frdmk82f/demo_apps/hello_world/kds
메뉴에 헤머 아이콘을 눌러 빌드한다.
FRDM-K82F는 기본적으로 mbed/CMSIS-DAP debug interface 가 설치가 되어있으므로 KDS에서 다운로드 디버깅을 하기위해서는 J-Link OpenSDAv2.1를 설치해야 한다. 리셋 버튼을 누른상태에서 “SDA USB” USB 포트를 연결해서 전원을 연결한다. 그러면 BOOTLOADER로 폴더가 잡힌다.
https://www.segger.com/opensda.html 여기에서 OpenSDA V2.1: Download JLink_OpenSDA_V2_1_2015-10-13.zip 을 다운로드후 압축을 풀고 bin파일을 BOOTLOADER 폴더에 넣으면 다시 JLINK라는 폴더로 잡힌다.
Run > Debug Configurations에서 맨 아래있는 GDB SEGGER J-Link를 선택하고 디버깅을 한다.
Hellow World의 경우 시리얼 터미널 설정은 115200. 보드의 전원 및 디버깅을 위해서 USB SDA 포트와 PC를 연결한다.
0 comments Top 5 IoT Industries
3가지 이슈 – 보안, 상호호환성, 연결방식
주로 사용되는 메시징 프로토콜은 MQTT, HTTP
클라우드 서비스는 아마존 클라우드
여기 나온 PT자료도 같이 보면 좋을 듯: http://hackerboards.com/dig-into-iot-with-41-openiot-summit-presentations/
0 comments 