:::: MENU ::::
Posts tagged with: BLE

SES(Segger Embedded Studio)에서 NRF_LOG_INFO 문제

SES환경에서 NRF_LOG_INFO(“Blinky example started!!!”)와 같은 같은 디버그 문구가 Debug Terminal에 보이지 않는 이슈 해결 방법

sdk_config.h 파일에서 다음과 같이 기존에 1로 설정되어 있던 값을 0 으로 수정한다.

#define NRF_LOG_DEFERRED 0
#define NRF_FPRINTF_FLAG_AUTOMATIC_CR_ON_LF_ENABLED 0

#define NRF_LOG_BACKEND_RTT_ENABLED 1
#define NRF_LOG_ENABLED 1
이 설정도 되어 있어야 함.

그런데 다음 설정은 0으로 되야 함
#define NRF_LOG_BACKEND_UART_ENABLED 0

그리고 보드가 바뀌면 아래 핀 설정도 같이 해야 함.
#define NRF_LOG_BACKEND_UART_TX_PIN 6


코인셀 배터리 사용시 시스템 설계

코인셀 배터리의 경우 용량도 중요하지만 한번에 땡겨서 쓸 수 있는 전류도 중요하다. 하지만 이 값은 일반적으로 충분히 크지 않다.

따라서 코인셀 배터리의 용량만큼 잘 쓰려면

  • 코인셀에 병렬로 cap을 달아라. 47~100uF, 슈퍼캡?
  • 전류소모가 낮은 부품으로 구성 (당연한 얘기)
  • FEP(Functional End Point) 마진 확보 : 즉 구동 전압이 낮은 칩 사용
  • 테스트 결과를 보면 전류를 갑자기 땡기는 구간이 짧아야하고, 휴지기간이 길어야 한다.
  • 시스템을 설계할때 동시에 구동되는 부품을 줄이도록 설계: 즉 RF칩이 TX를 할때 모터를 구동하지 않는 다거나… (LCD, 모터, RF칩, LED) <= 이게 중요할 듯

참고문헌


Puck.JS 사용법

FEATURES

  • Bluetooth Low Energy
  • Espruino JavaScript interpreter pre-installed
  • nRF52832 SoC – 64MHz Cortex M4, 64kB RAM, 512kB Flash
  • 8 x 0.1″ GPIO (capable of PWM, SPI, I2C, UART, Analog Input)
  • 9 x SMD GPIO (capable of PWM, SPI, I2C, UART)
  • ABS plastic rear case with lanyard mount
  • Silicone cover with tactile button
  • MAG3110 Magnetometer
  • IR Transmitter
  • Built in thermometer, light and battery level sensors
  • Red, Green and Blue LEDs
  • NFC tag programmable from JavaScript
  • Pin capable of capacitive sensing
  • Weight: 14g in plastic case, 20g in packaging
  • Dimensions of cardboard box: 64mm x 62mm x 16mm
  • Dimensions of plastic case: 36mm dia, 12.5mm thick
  • Dimensions of bare PCB: 29mm dia, 9mm thick

회로도 및 PCB Layout Eagle File

ON-BOARD LEDS, BUTTON AND GPIO

LEDs

  • Red LED on: digitalWrite(LED1,1), Off: digitalWrite(LED1,0)
  • LED2 : green, LED3: blue
  • LED1.write(1) or  LED1.write(0)
  • LED1.set(), LED1.reset()
  • 3개의 LED 한꺼번에 제어 digitalWrite([LED3,LED2,LED1], 7)

Button

  • digitalRead(BTN) or BTN.read()
  • 버튼 상태를 Polling 하는 것은 power 소모가 심하므로, setWatch 함수를 사용해서 버튼 상태가 바뀌는 것을 체크함.

    setWatch(function() { console.log(“Pressed”);}, BTN, {edge:”rising”, debounce:50, repeat:true});

GPIO pins

  • GPIO 핀은 D0 부터 D31까지.  digitalWrite/digitalRead 커맨드를 사용할 수 있고 PWM, I2C, SPI and Analog 사용 가능

ON-BOARD PERIPHERALS

  • Magnetometer
  • IR / Infrared
  • NFC – Near Field Communications
  • Light sensor
  • Bluetooth
  • Temperature
  • Battery level
  • Capacitive sense
  • SERIAL CONSOLE

FIRMWARE UPDATES

via nRF Toolbox App (Android & iOS)

  • On your Bluetooth LE capable phone, install the nRF Toolbox app
  • Download the latest espruino_xxx_puckjs.zip file from the binaries folder
  • Reset Puck.js with the button held down – the Green LED should be lit
  • Release the button within 3 seconds of inserting the battery – the Red LED should light instead. If it doesn’t, you’ll need to try again, holding the button down for less time after inserting the battery.
  • Open the nRF Toolbox app
  • Tap the DFU icon
  • Tap Select File, choose Distribution Packet (ZIP), and choose the ZIP file you downloaded
  • Tap Select Device and choose the device called DfuTarg
  • Now tap Upload and wait. The LED should turn blue and the DFU process will start – it will take around 90 seconds to complete

Espruino IDE 사용하기

  • Web Bluetooth 사용 설정: Mac에서 BLE가 지원되는지 확인하는 법은 “이 Mac에 관하여” > 시스템 리포트 > 하드웨어 > Bluetooth 항목아래 ” Bluetooth 저에너지 기술이 지원됨” 이 “예”라고 표시되어 있는지 확인한다.
  • 크롬에서 주소표시줄에 chrome://flags를 입력하고, ” #enable-web-bluetooth” 항목을 사용하도록 설정하고 브라우저를 다시 시작함.
  • https://www.espruino.com/ide/ 에서 Web IDE를 시작한다.
  • Web IDE에서 연결 버튼을 클릭하고, Port설정에서 Web Bluetooth를 선택한다.

참고: https://www.espruino.com/Puck.js+Quick+Start


피지컬 웹 (Physical Web)

IoT 디바이스에 접급을 위해서 앱이 필요한 경우가 있는데, 이럴 경우 디바이스마다 앱이 존재하게 된다. 구글에서는 이걸 웹에서 해결하겠다는 접근이 피지컬 웹(Physical Web)이다. 이렇게 할 때의 장점은 디바이스에는 적은 기능만 넣고, 나머지는 웹쪽에서 구현을 하겠다는 의미이다. 이때 IoT 디바이스(비콘)가 자신의 URL을 주기적으로 Broadcasting하기만 하면 된다.
관련 정보
https://github.com/google/physical-web


Mac OS X에 nRF51 개발 환경 설정하기

1. gcc 설치
여기에서 다운로드 한다.

$ mkdir /usr/local/gcc-arm
$ tar -xjf gcc-arm-none-eabi-5_4-2016q3-20160926-mac.tar.bz2 -C /usr/local/gcc-arm

2. nRF5x-Command-Line-Tools-OSX
여기에서 다운로드 한다.
/usr/local/ 에 nrfjprog와 mergehex를 copy한다.

3. .bash_profile 수정

export PATH=/usr/local/bin:/usr/local/sbin:/usr/local/nrfjprog:$PATH

4. Segger Software and documentation pack for Mac OS X 설치
여기에 패키지 파일이 있다.

5. SDK설치 및 Makefile.posix 파일 수정
여기 또는 여기에서 SDK를 다운로드 해서 원하는 곳에서 압축을 푼다.
components/toolchain/gcc/Makefile.posix 이 파일을 gcc 버전에 맞게 수정한다.

GNU_INSTALL_ROOT := /usr/local/gcc-arm/gcc-arm-none-eabi-5_4-2016q3
GNU_VERSION := 5.4.1
GNU_PREFIX := arm-none-eabi

6. 컴파일 및 확인
example 폴더 아래에서 make해서 hex 파일이 생성되는지 확인한다.

$ make

7. 보드와 연결해서 다운로드가 되는지 확인한다.

$ make flash

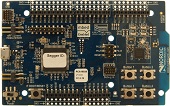
Nordic에서 출시한 보드

PCA10028

PCA10031

참고
https://devzone.nordicsemi.com/blogs/22/getting-started-with-nrf51-development-on-mac-os-x/
https://aaroneiche.com/2016/06/01/programming-an-nrf52-on-a-mac/
http://www.nordicsemi.com/eng/Products/Bluetooth-low-energy/nRF51822
Getting started with the nRF5 development kit
https://devzone.nordicsemi.com/tutorials/


Wi-Fi Direct, ad hoc, Bluetooth 4.0 비교

Wi-Fi Direct

Wi-Fi Direct가 무엇인지를 알기쉽게 나타내는 동영상

그럼 Wi-Fi Direct와 기존 ad-hoc은 어떻게 다른가?

Wi-Fi Direct is not the same as ad-hoc networking: The most significant difference between traditional ad-hoc wireless networking (traditional peer-to-peer networking) and Wi-Fi Direct is security. In Windows ad-hoc networks, the highest level of security supported is WEP in mixed client environments (Windows 7 will support WPA2 provided all adapters support it, as well). Wi-Fi Direct, as mentioned, supports WPA2. Another difference, Wi-Fi Direct devices can also simultaneously connect to existing wireless networks. More granular control and better discovery of devices also differentiate Wi-Fi Direct from ad-hoc networking

출처: http://www.pcmag.com/article2/0,2817,2371413,00.asp

Bluetooth Smart (BLE 4.0)

참고로 요즘 Bluetooth Smart라고 불리는 Bluetooth 4.0 (Low Energy Technology)에 대한 간단한 스펙은…

  • 속도: 25Mbps
  • 거리: 200 feet
  • 암호와: AES-128