Adafruit에서 만든 자료로 Stepper motor에 대해 잘 정리되어 있다.
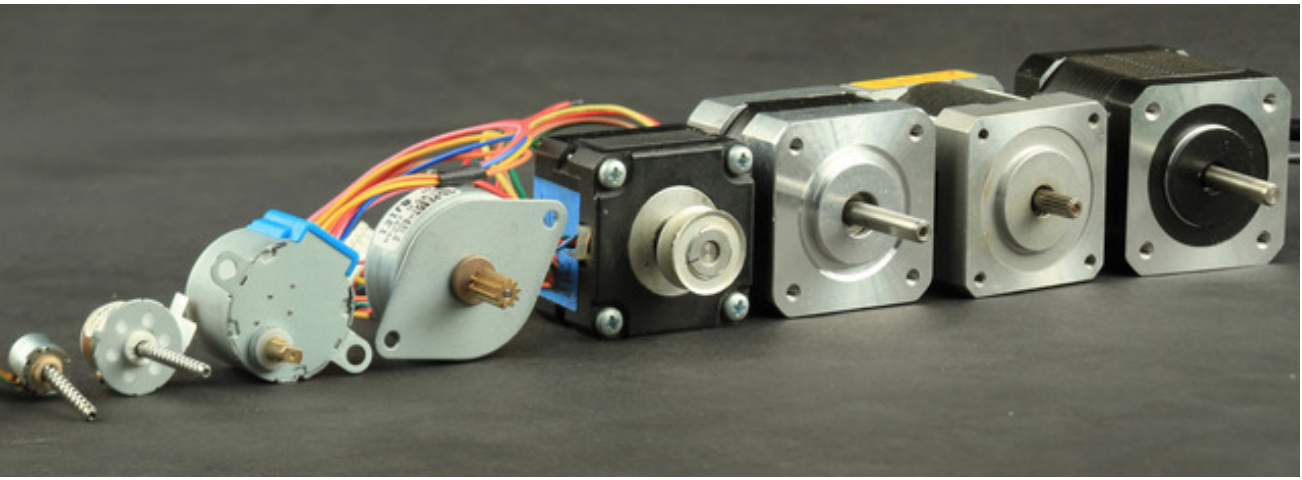
https://cdn-learn.adafruit.com/downloads/pdf/all-about-stepper-motors.pdf
 0 comments
 Adafruit에서 만든 자료로 Stepper motor에 대해 잘 정리되어 있다.
https://cdn-learn.adafruit.com/downloads/pdf/all-about-stepper-motors.pdf
0 comments 한번에 찾기 힘들어서…
0 comments 맥에서 AVR 개발 환경을 셋업하는 방법은 AVR SetupStep-by-step how to install AVR dev tools에 잘 정리가 되어있다. 기본적으로 Arduino IDE를 설치하면 컴파일러나 make까지 설치가 되는데, Marlin 코드를 컴파일해서 다운로드 할 경우 make파일에 avrdude의 경로 설정이 없어서 이 경로를 .bash_profile에 설정을 하거나 avrdude를 홈 디렉토리에 설정을 하면된다.
cd avrdude-6.3
./configure
make
sudo make install
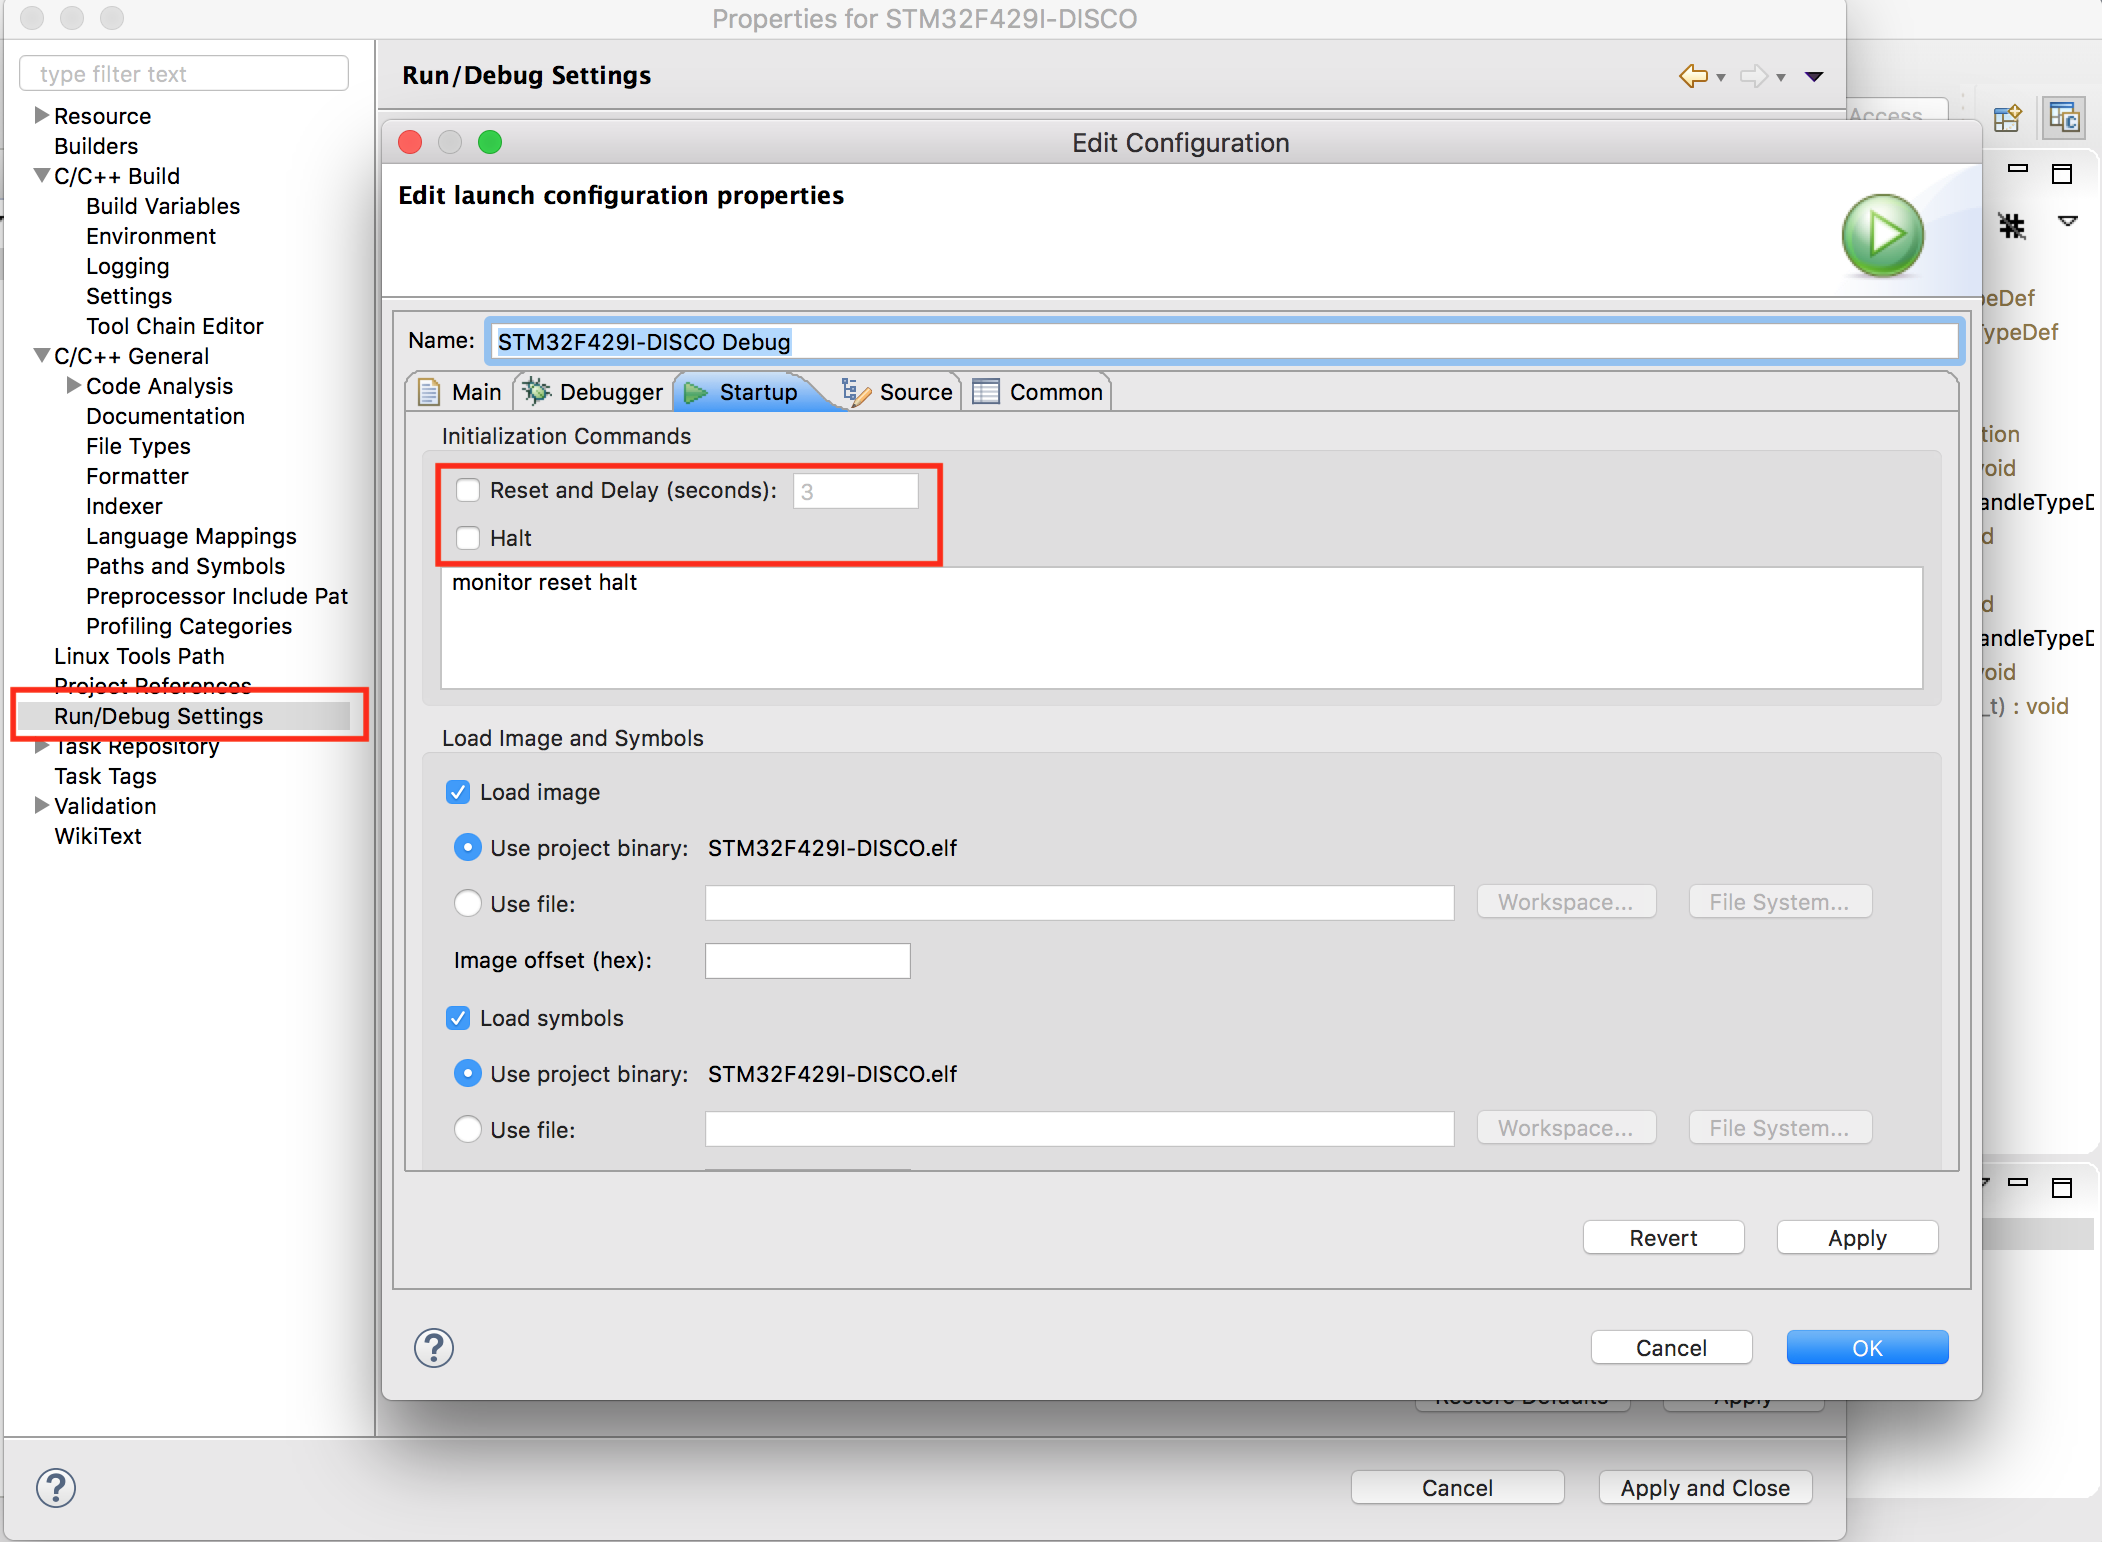
0 comments Stm32Cube와 Eclipse의 조합으로 개발을 할때 연결된 보드를 디버깅시 다음과 같은 에러 메시지가 뜰 경우가 있다.

이럴때는 프로젝트의 설정의 Run/Debug Setings의 Startup 탭에서 다음 그림에 보이는 2가지 항목의 설정을 해제하면 된다.
0 comments 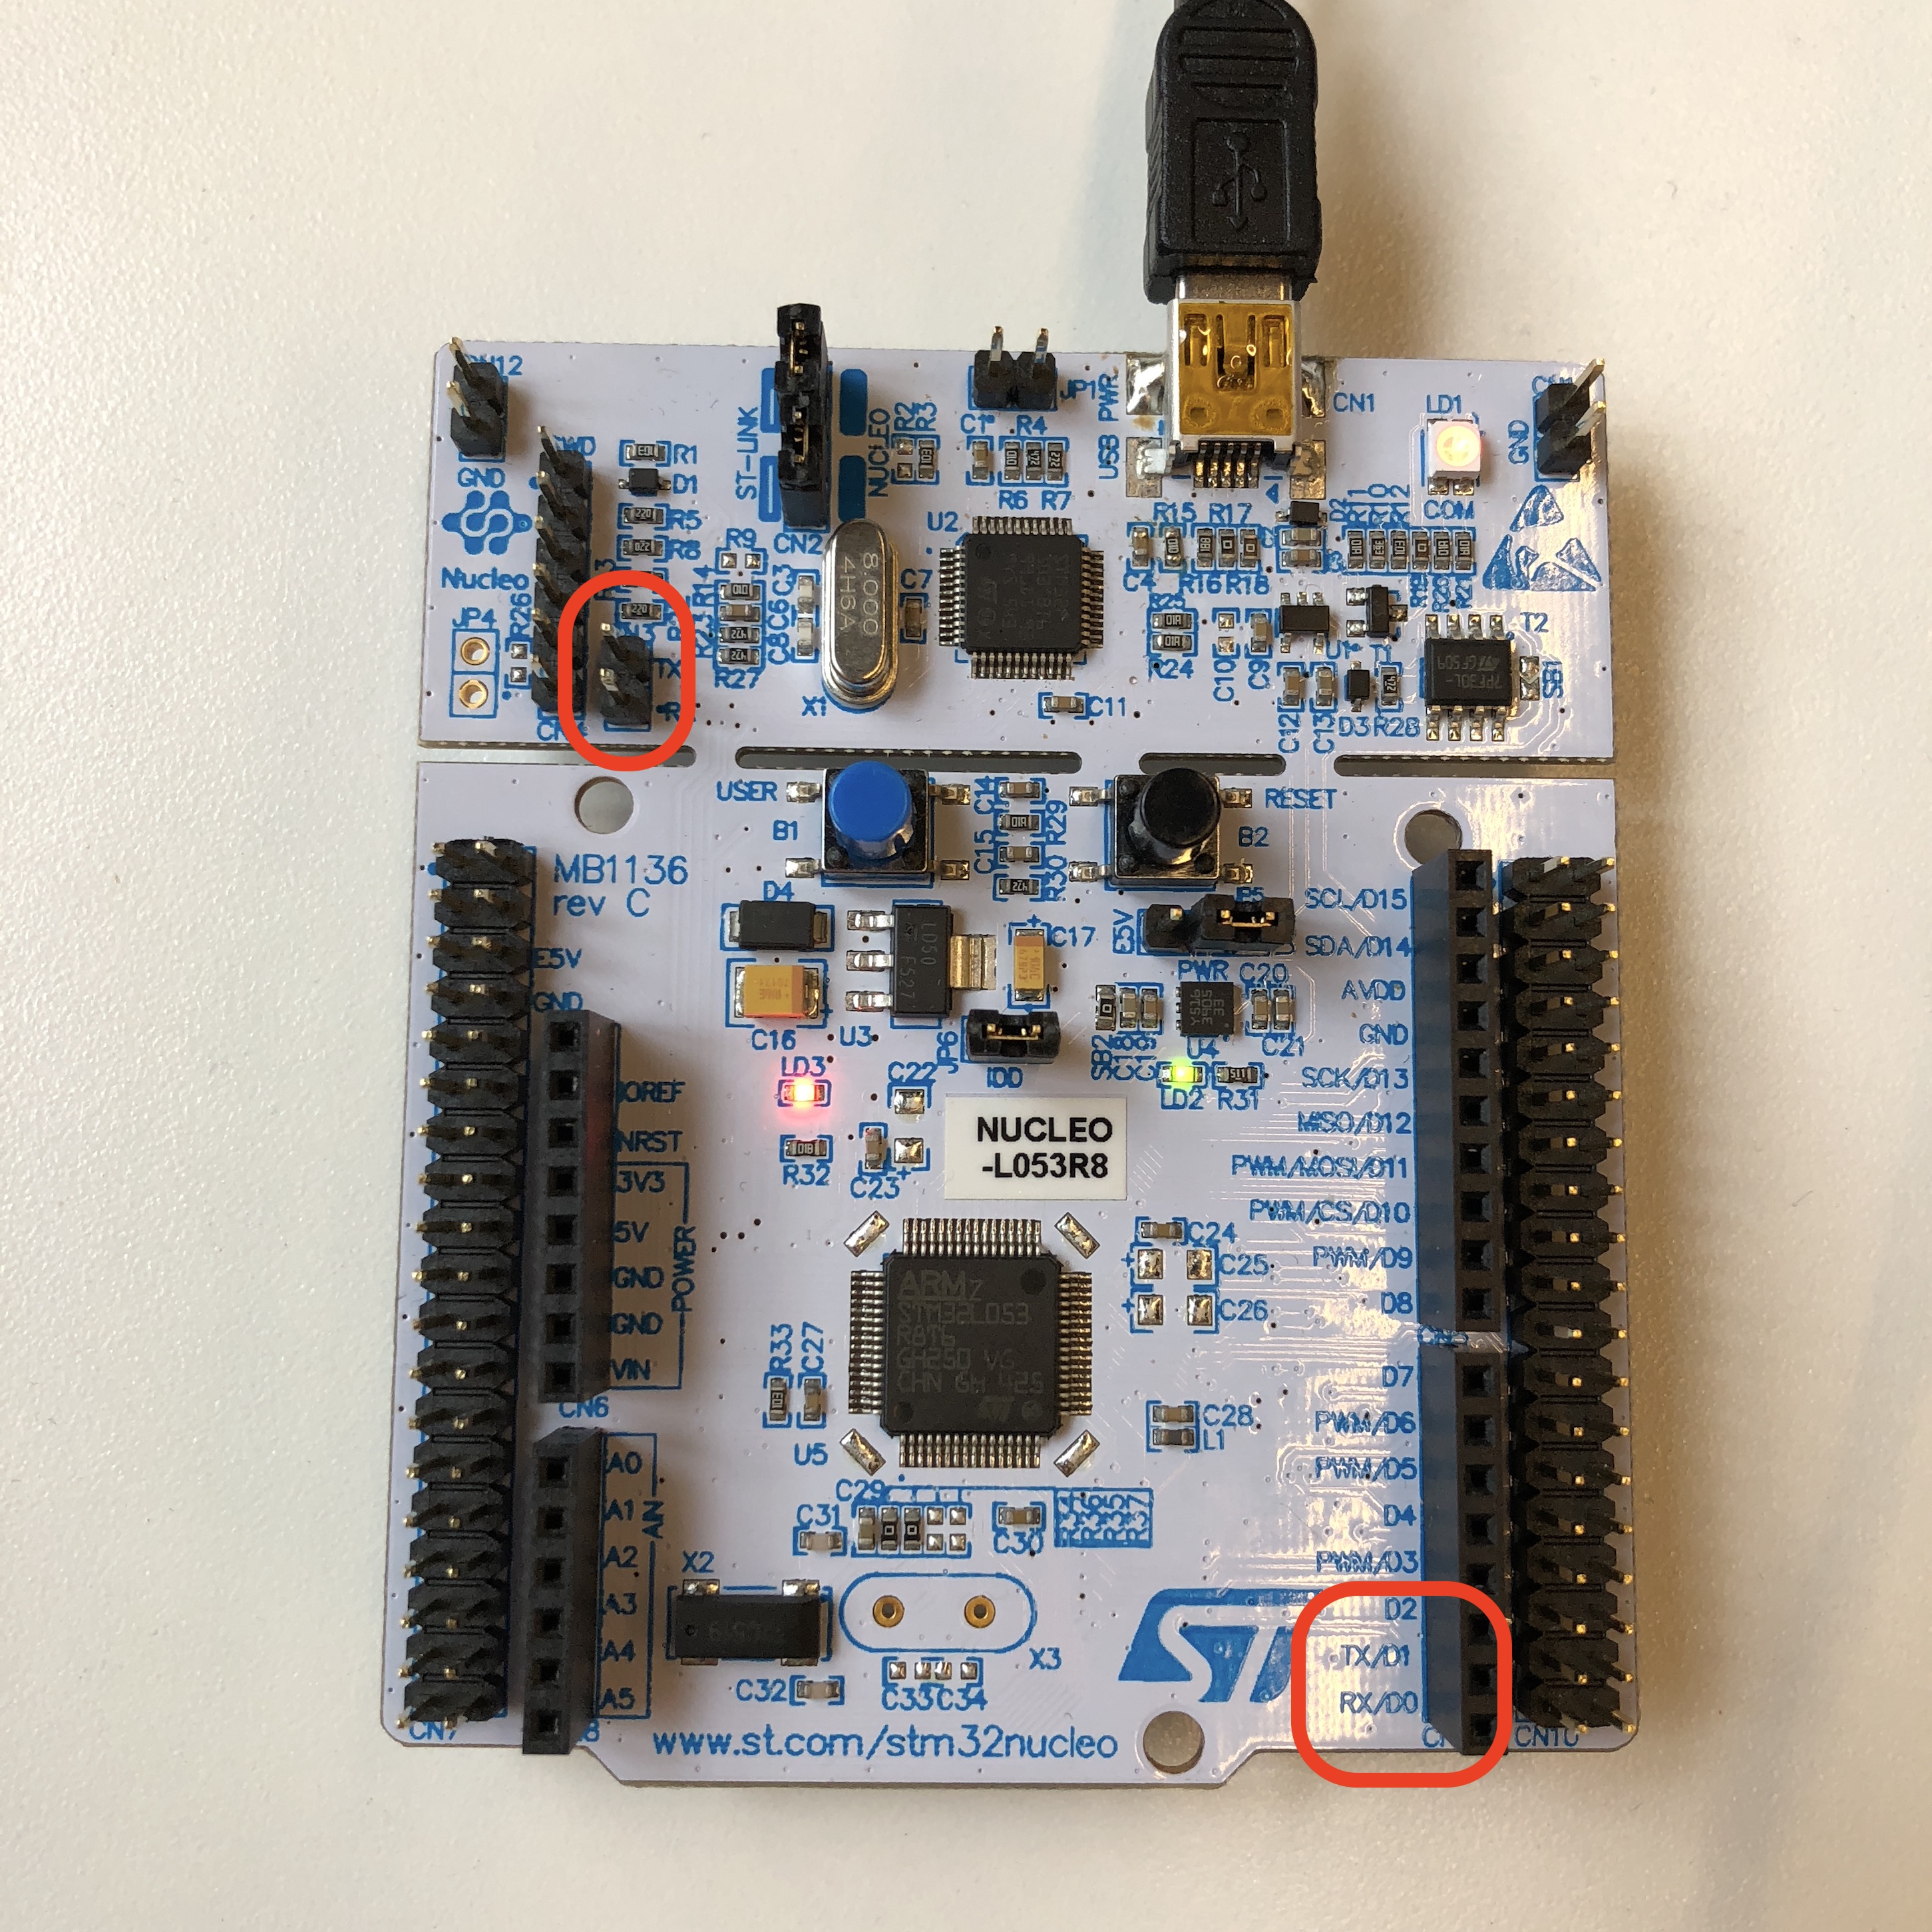
임베디드 보드에서의 Hello World인 blink 테스트를 끝나면 printf를 찍기위해 UART를 연결하고 테스트를 한다. Nucleo 보드에서도 마찬가지로 작업을 하는데, 회로도를 보면 아두이노 핀 호환 컨넥터의 TX, RX핀에 연결이 되어있다. 하지만 자세히 회로도를 보면 default 연결은 이 핀들이 아니라 ST-Link칩에 연결이 되어 있다. 즉 UART2의 경우 ST-Link를 통해서 USB 컨넥터에 연결이되고 virtual COM port로 잡힌다. 매뉴얼에 보면 다음과 같이 나온다.
The USART2 interface available on PA2 and PA3 of the STM32 microcontroller can be connected to ST-LINK MCU, ST morpho connector or to Arduino connector. The choice can be changed by setting the related solder bridges. By default the USART2 communication between the target STM32 and ST-LINK MCU is enabled, in order to support virtual COM port for MbedTM (SB13 and SB14 ON, SB62 and SB63 OFF). If the communication between the target STM32 PA2 (D1) or PA3 (D0) and shield or extension board is required, SB62 and SB63 should be ON, SB13 and SB14 should be OFF. In such case it is possible to connect another USART to ST-LINK MCU using flying wires between ST morpho connector and CN3.
따라서 아두이노 핀 호환핀에 연결을 하려면 점퍼 설정을 다시해야 하는데, printf를 위해서라면 virtual COM port를 사용하면 되니 그럴 필요는 없다.
0 comments ST-LINK 펌웨어 업데이트를 위한 프로그램 : 맥용 프로그램도 제공

0 comments 
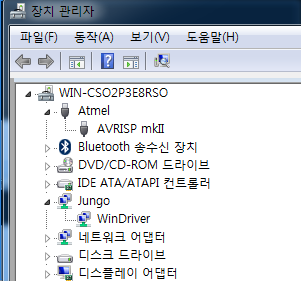
0 comments AVR Studio 4에서는 AVRISP mkII의 윈도우즈 USB 디바이스 드라이버가 Jungo 드라이버로 장치관리자의 Jungo아래 WinDriver와 함께 설치가 된다. 하지만 Atmel Studio 7이 설치가 되면 이것이 삭제가 되면서 Atmel아래 AVRISP mkII가 생기면서 더이상 AVR Studio 4에서는 AVRISP mkII는 잡히지 않는다
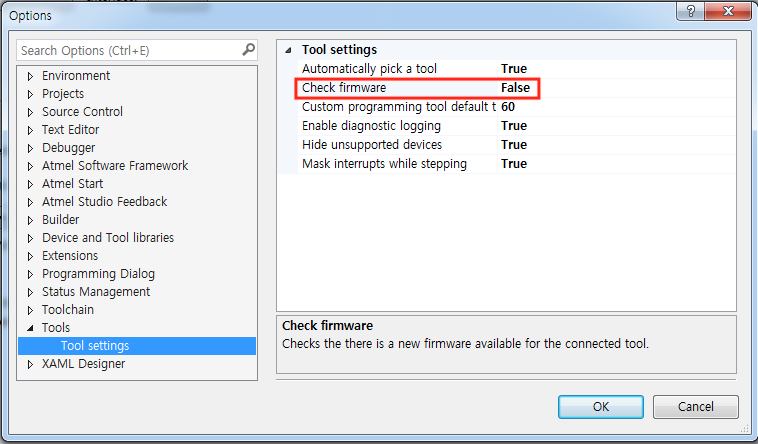
문제는 Atmel Studio 7에서 오래전에 구매한 AVRISP mkII를 연결을 하니, firmware를 업데이트 하라고 나온다.
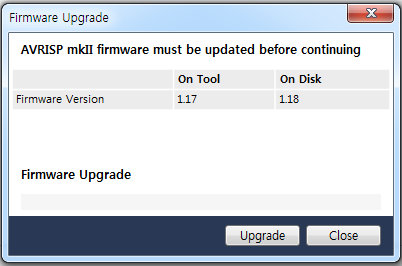
하지만 정품 툴이 아니라서 업데이트가 되지 않는다. 이것을 해결하려면 Tools > Options > Tool Settings >Check Firmware의 항목을 False로 하면 진행이 된다.
참고로 만약 지워진 AVR Studio 4의 Jungo 드라이버만 다시 설치를 하려면, C:\Program Files (x86)\Atmel\AVR Jungo USB\usb64 폴더에서 관리자 계정으로 커멘드 창에서 다음과 같은 명령으로 드라이버 설치가 가능하다.
wdreg -inf windrvr6.inf install
참고: https://www.olimex.com/Products/AVR/Programmers/AVR-ISP-MK2/open-source-hardware
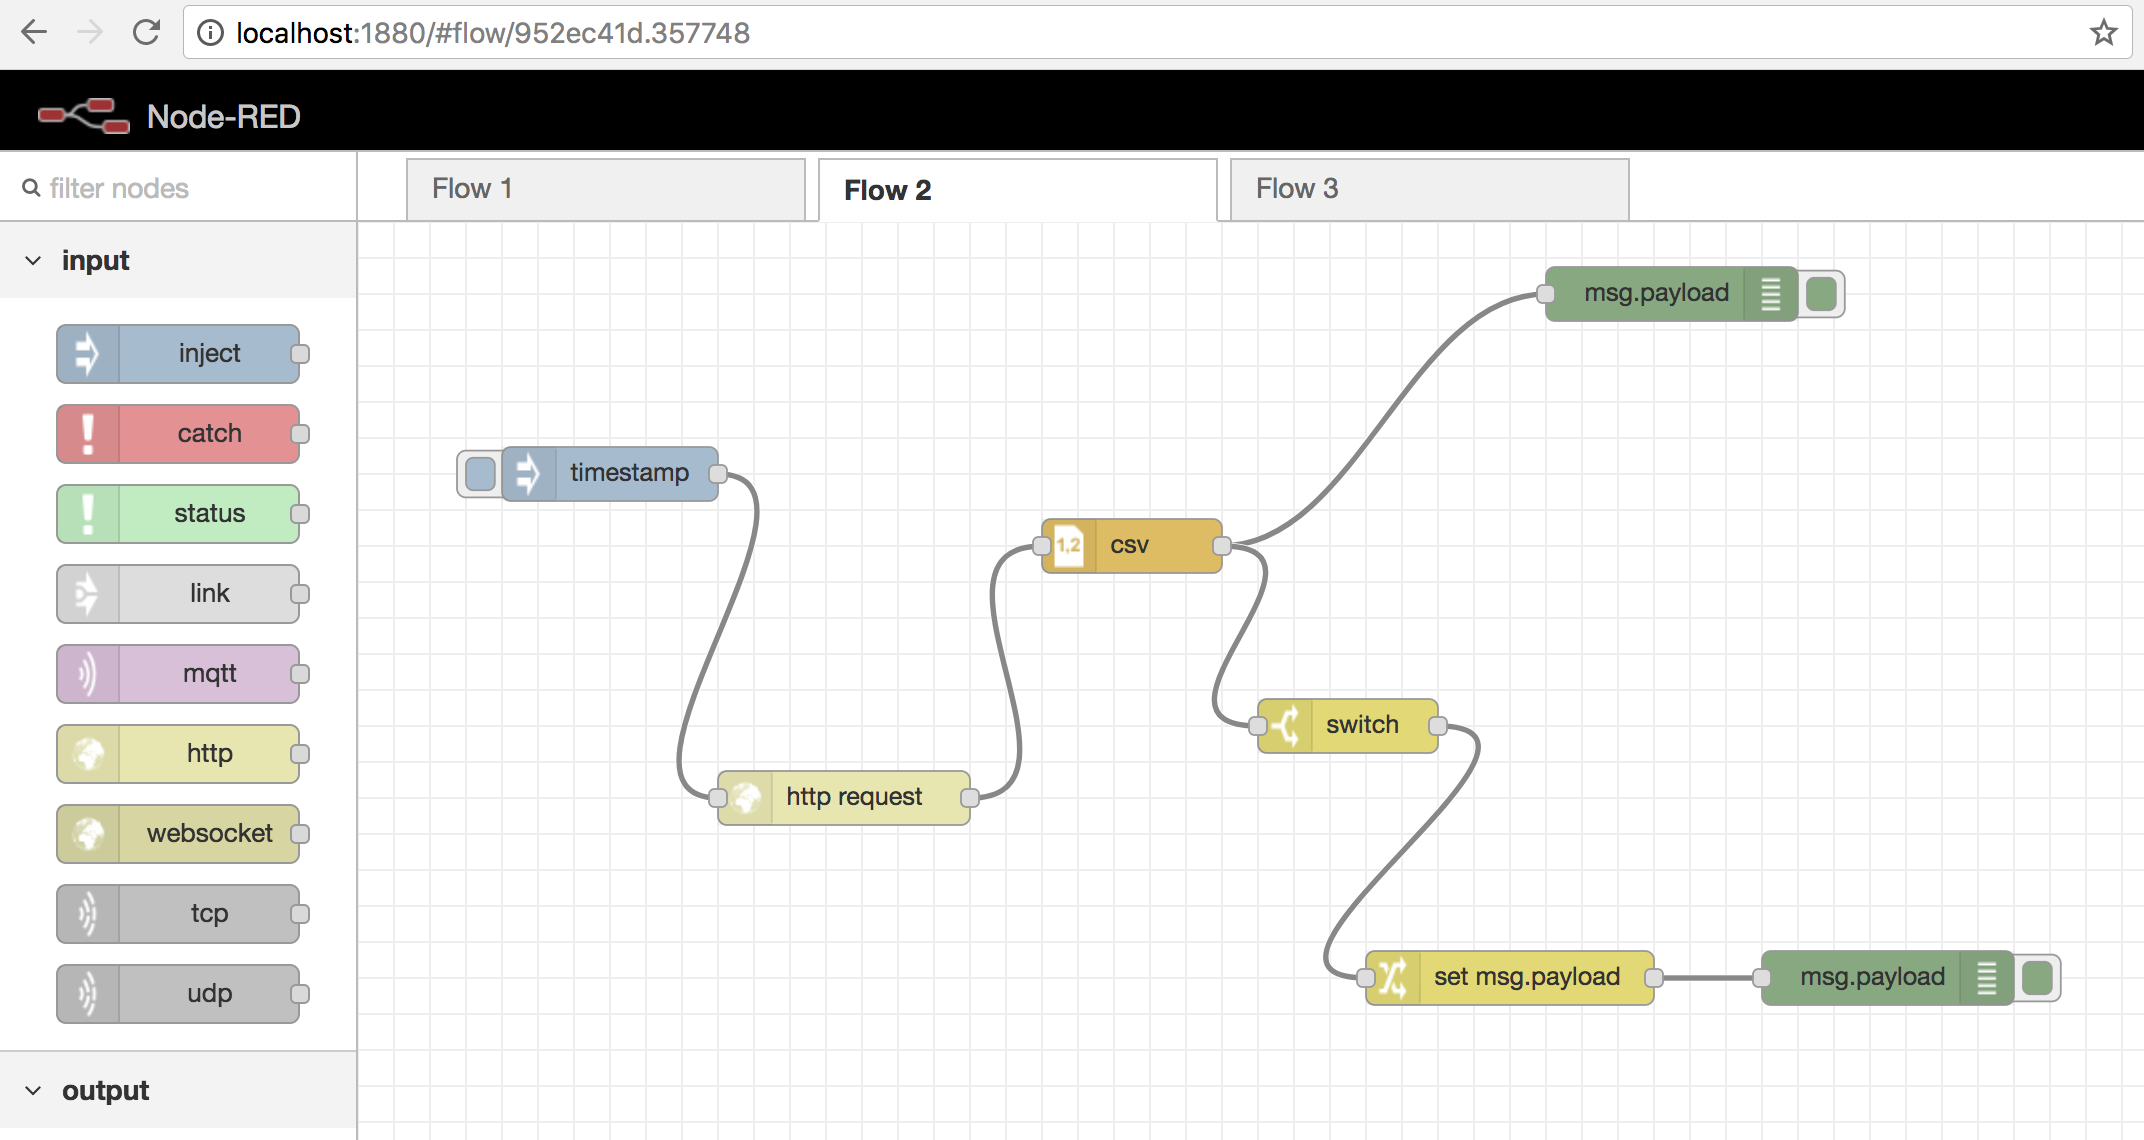
0 comments Node-RED를 사용하려면 먼저 Node.js 를 설치해야 한다.
https://nodejs.org/en/#download 여기서 설치파일을 다운로드해서 설치한다.
터미널에서 node -v로 버전이 v8.10.0인지 확인한다.
sudo npm install -g –unsafe-perm node-red
커맨드라인에 node-red를 입력하여 실행후 브라우저에서 http://localhost:1880/ 를 입력하면 Node-Red 에디터가 뜬다.
0 comments