:::: MENU ::::

실내 측위 – BLE Tag, AoA, AoD

기존 비콘의 한계

  • Beacons only work with smartphones, not tags, which limits how they can be used
  • They are able to locate objects in best case within 3-4 meters, which is fine for determining a general location, but is not refined enough to meet the requirements for many of today’s applications
  • Beacons are battery-operated, which impacts their ability to deliver real-time location; frequent transmissions drain the device’s battery, meaning frequent replacements are necessary

AoA, AoD의 사용

AoA(신호의 수신 각도): 기기가 수신기 안테나 배열로 부터 오는 정확한 방향을 기반으로 한다. AoA를 사용하면 신호를 측정하기 위해 동일한 장치 내에서 여러 개의 안테나가 사용된다. 이렇게하면 안테나가 미터가 아닌 10-20 센티미터의 정확도로 태그 또는 스마트 폰을 찾을 수 있다.

AoD (신호의 출발 각도): 이 접근법에서 위치 정보는 모바일 장치로 다시 이동한다. AoD 접근법은 “실내 GPS”와 같이 작동하는데 고정 인프라 장치 (Locators라고도 함)는 GPS 위성 작동 방식과 마찬가지로 수신 장치를 브로드캐스트하고 인식하지 못한다. 즉, 무제한의 장치를 찾을 수 있고 개인 정보 문제는 없다.

참고


Ultimaker Cura의 구조


  • Cura의 대부분은 Python으로 작성되어 있고, 인터페이스는 PyQt를 사용
  • CuraEngine은 슬라이싱을 담당하고, C++로 작성
  • Cura CuraEngine(슬라이싱 담당)의 통신에는 Arcus library를 사용.
  • 즉 Cura에서 모델과 슬라이싱 옵션을 CuraEngine에 보내면 G-code를 리턴함
  • Uranium: 3D 관련 세팅, 3D-scenes을 위한 Python Framework


AVR Studio 4에서 Atmel Studio 7에서 마이그레이션

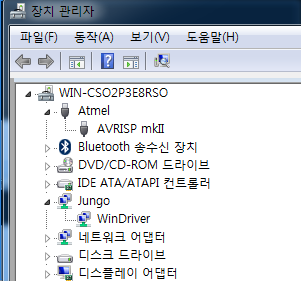
AVR Studio 4에서는 AVRISP mkII의 윈도우즈 USB 디바이스 드라이버가 Jungo 드라이버로 장치관리자의 Jungo아래 WinDriver와 함께 설치가 된다. 하지만 Atmel Studio 7이 설치가 되면 이것이 삭제가 되면서 Atmel아래 AVRISP mkII가 생기면서 더이상 AVR Studio 4에서는 AVRISP mkII는 잡히지 않는다

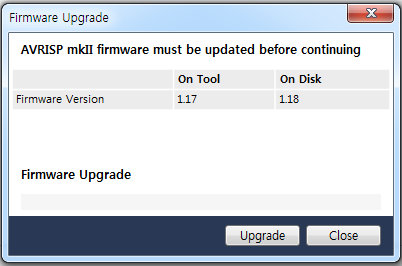
문제는 Atmel Studio 7에서 오래전에 구매한 AVRISP mkII를 연결을 하니, firmware를 업데이트 하라고 나온다.

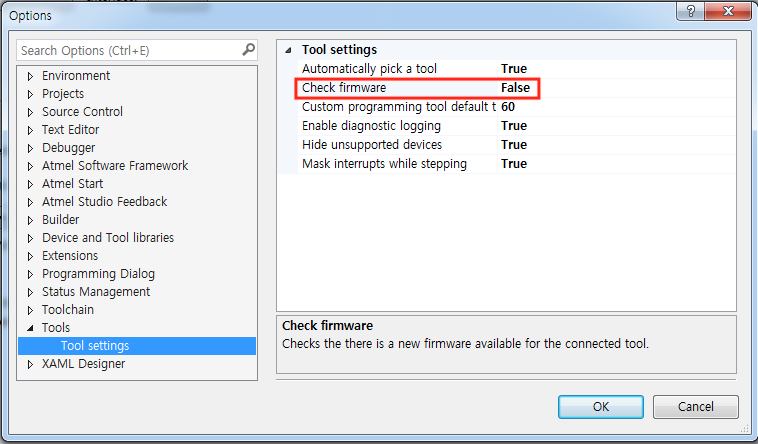
하지만 정품 툴이 아니라서 업데이트가 되지 않는다. 이것을 해결하려면 Tools > Options > Tool Settings >Check Firmware의 항목을 False로 하면 진행이 된다.

참고로 만약 지워진 AVR Studio 4의 Jungo 드라이버만 다시 설치를 하려면, C:\Program Files (x86)\Atmel\AVR Jungo USB\usb64 폴더에서 관리자 계정으로 커멘드 창에서 다음과 같은 명령으로 드라이버 설치가 가능하다.

wdreg -inf windrvr6.inf install

참고https://www.olimex.com/Products/AVR/Programmers/AVR-ISP-MK2/open-source-hardware

AVR Studio 4 다운로드


Node-RED 사용하기

Node-RED를 사용하려면 먼저 Node.js 를 설치해야 한다.

Node.js (Node.js LTS 8.x) 설치

https://nodejs.org/en/#download 여기서 설치파일을 다운로드해서 설치한다.

터미널에서 node -v로 버전이 v8.10.0인지 확인한다.

Node-RED 설치

sudo npm install -g –unsafe-perm node-red

Node-RED 실행

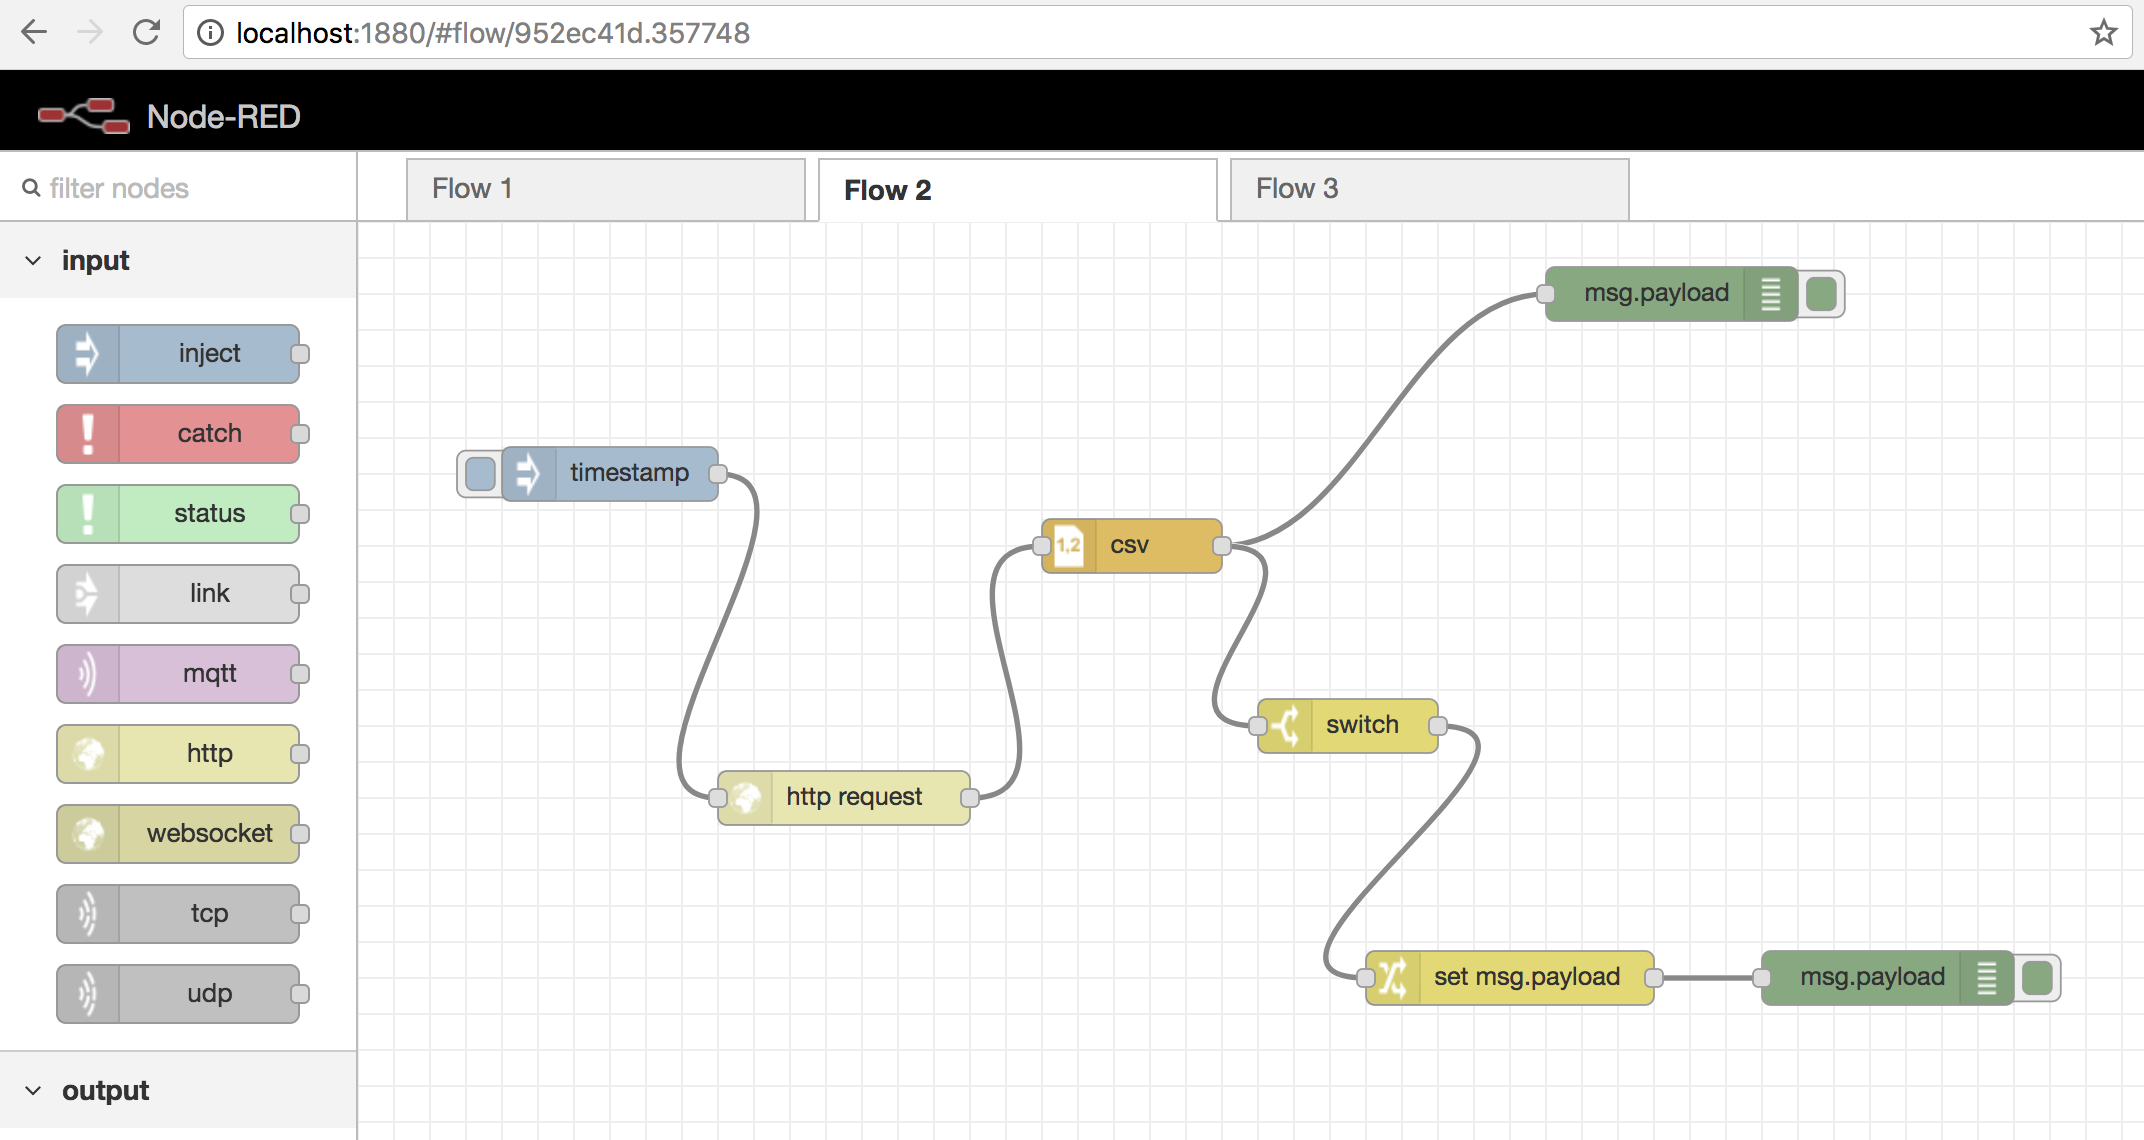
커맨드라인에 node-red를 입력하여 실행후 브라우저에서 http://localhost:1880/ 를 입력하면 Node-Red 에디터가 뜬다.

첫번째 간단한 예제


EagleCAD differential signal 설계

USB와 같이 differntial signal을 설계시 참고할 수 있는 내용.

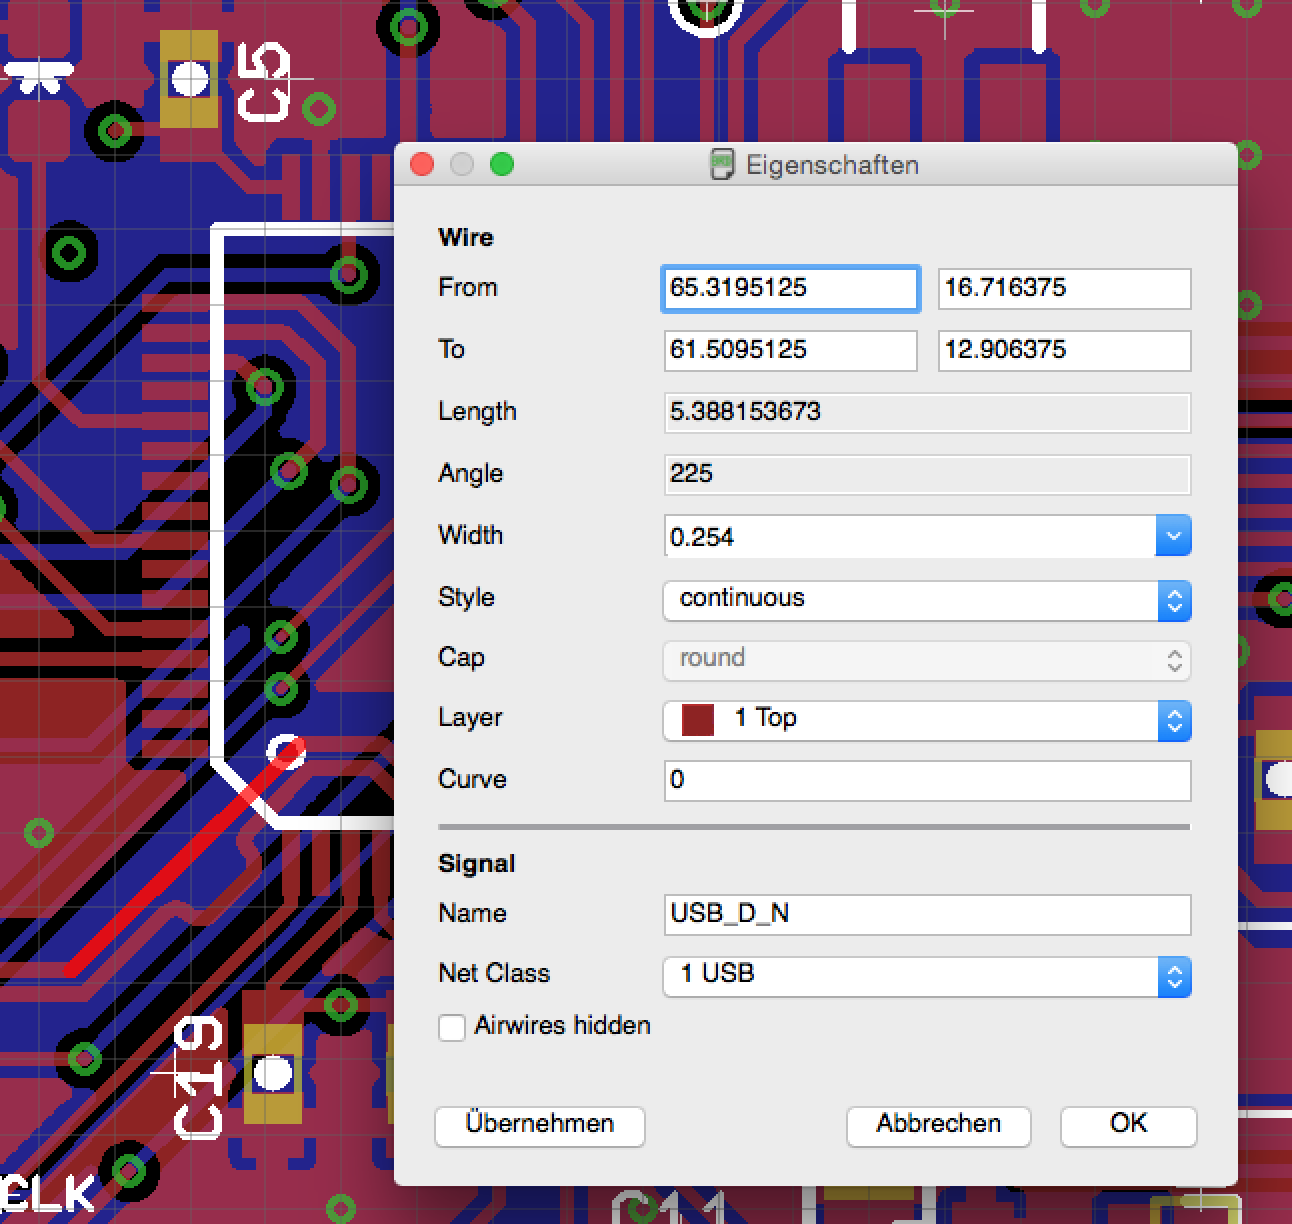
The first step is to create and set net classes. In EAGLE go to Edit->Net classes. There you can create different values for trace width and clearance. Differential pairs should have quite a big clearance to copper pours (2-3 times the track width). Therefore I entered two net classes, one for USB (#1) and one for the top copper pour (#2) as my USB signal is routed on the top layer. As you can see I entered the values from the impedance calculator in net class #1. 10mil for track width. In Clearance Matrix you tell EAGLE how much clearance the different net classes will be used by the Auto Router or differential pair routing. These settings tell EAGLE that USB traces should be separated by 6.25mil and that USB traces should have a clearance of 30 mil to the traces (copper pours) set to net class #2.

In the next step you have to set the net classes of the traces. I selected each of both USB traces one after the other and set the USB net class in the bottom area of the Info dialog window. Don’t forget to set the Top GND net class to the polygon forming the top copper pour. If you don’t have a top copper pour you don’t need to do that.

참고: http://www.appfruits.com/2015/03/building-your-own-custom-teensy/


OpenSCAD Customizer

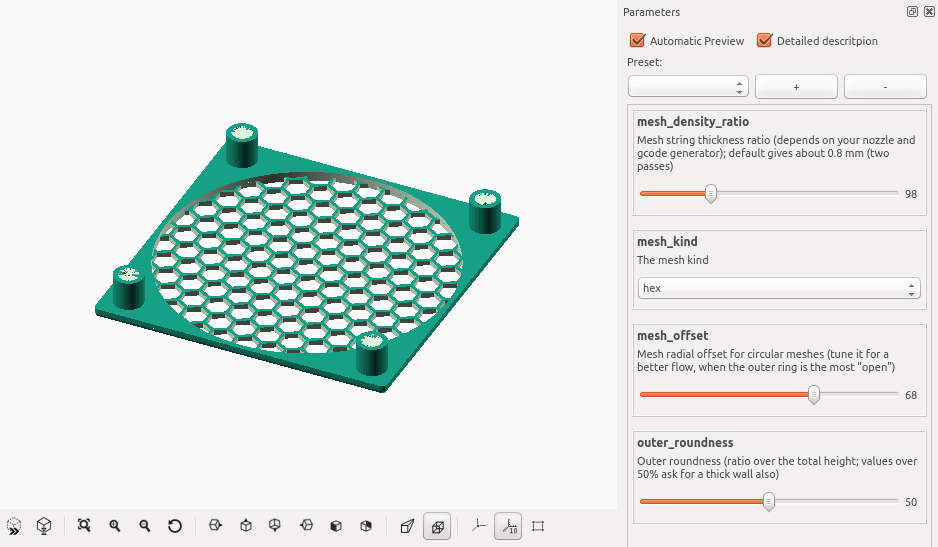
OpenSCAD에서 Customizer의 기능 사용법

  • 개발자버전의 스냅샷 중 최신버전을 다운로드 받는다.
  • Preferences >Features > Customizer를 체크한다.
  • View > Hide Customizer의 체크를 해제한다.

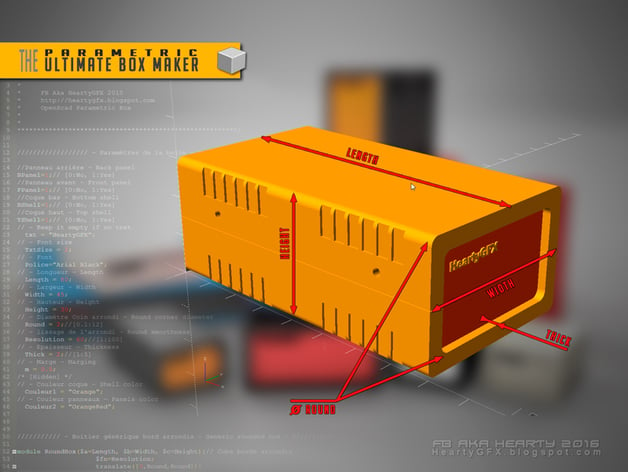
케이스 모델링 자료

https://www.thingiverse.com/thing:1264391

참고:


Pages:1...567891011...56